Учебники по созданию музыки, руководства, статьи

Создавайте группу онлайн, продвигайте свою музыку, покупайте собственные биты, звуковые партии и делитесь с нами своим битом или треком в качестве лупа без лицензионных отчислений. Сотрудничайте, чтобы создавать биты онлайн с лучшими производителями лупов со всего мира на Форуме для музыкантов и создателей битов. Будьте в курсе музыкальных новостей и изучайте видеоуроки FL Studio и статьи в блоге . Бесплатные загрузки музыкального программного обеспечения DAW, пакеты VST и инструментов для FL Studio, Pro Tools, Logic, Ableton, а также способы использования самого популярного бесплатного программного обеспечения DAW, плагинов Fruity Loop, MIDI и многого другого.

Узнайте, как создавать музыку с помощью учебника по созданию музыки Loopazon, руководств для начинающих и пошаговых статей с образцами битов. Как использовать инструменты FL Studio с контроллером Midi, руководства по загрузке плагинов VST для Ableton, Logic и DAW.

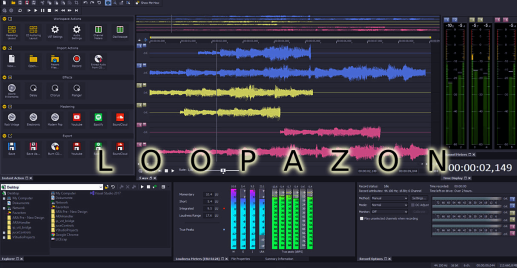
Introduction to Samplitude

12/18/2020
We did have an introductory tour of Magix Music Maker, one of the earliest DAWs, that debuted in 1994 and continues to be a hot favorite among Windows users who wish to start producing music. Samplitude , the elder sibling of Music Maker too ought to be discussed as it was the first full-fledged professional Digital Audio Workstation sold by Magix. While Music Maker was aimed at hobbyists, amateurs and beginners, Samplitude was aimed exclusively for full-time professional music producers for recording, mixing, mastering and editing music. Even today, Samplitude continues to be a gestating platform for music producers and audio engineers before they migrate to more comprehensive industry standard options like Cubase and Pro Tools. The application originally developed and marketed by German software company SEK’D was completely acquired by Magix in 1998. Magix used the Samplitude as a base to enhance its existing DAW Music Maker, which was a beginner’s DAW. Samplitude too flourished under Magix competing with market leaders like Pro Tools and Cubase. Initially SEK’D had developed and released Samplitude with 24-bit audio processing for Commodore’ s Amiga series of personal computers powered by the Amiga operating system. This version w hich debuted in 1992 w as soon followed by Samplitude Pro II, which came with HDR (Hard Disk Recording). The feedback to the second version was excellent among users and reviewers despite which Samplitude did not see a boom as it was limited to the Amiga platform. Engineers of the first two versions oversaw a major overhaul to the application, to make it compatible with Windows-powered personal computers, which were unarguably the most popular in the world. By early 1995, a stable version of Samplitude developed for the Windows 3.1 operating system was ready for release. This version was by far a major departure from the first two versions that were developed exclusively for Amiga systems as the full version (Studio) featured 16-track editing, built-in filters and external sync. The scale down versions Samplitude Pro and Samplitude Multimedia offered 8-track and 4-track audio editing respectively. After the acquisition by Magix subsequent versions integrated support for VSTi plugins, ASIO drivers etc. The Samplitude 8.0 released in 2005 included a beat-mapping tool inspired by ACID Pro and a virtual drum machine. It also enabled 5.1 surround mixing. Samplitude has evolved over the years, but has retained its unique selling point, the object-oriented work-flow. Let us take an introductory tour of the latest version of Samplitude, the Pro X5 edition: This is the intro screen of your Samplitude interface. One the left-hand side, you may click on (Create New) MULTITRACK PROJECT to create a new project on Samplitude. You may also create a new audio file in the WAV format by clicking NEW WAV file. To open existing projects, click on (Open File) MULTITRACK PROJECT on the right-hand side of the intro screen. You may also load an existing audio file by clicking the WAV FILE button. To traverse through the features of Samplitude, let us load an existing file. Do not worry if you have just installed Samplitude and are without any existing project . You may click on the Open Demo Song button on the right hand-side of the intro screen. This would load an existing Samplitude session Magix has included with the latest versions. The following is the project session of the Demo Song that comes with Samplitude. If you have worked on any other Digital Audio Workstation, this session view would not be alien to you. On your first glance, this is your traditional multi-track editing timeline. Even if you are totally new to DAWs, do not be intimidated by this snapshot as a simple explanation could get you started with editing and creating new projects on Samplitude.   Y ou may play the demo song first. To play the song load the Transport Control from the View menu. The transport control contains the PLAY, STOP, REWIND, FORWARD and RECORD buttons. The various elements you hear in the song lie in these multiple tracks. Each row is a track. This is similar to almost every other mainstream Digital Audio Workstation. The horizontal lines between various tracks are Curves that you may manually control with your mouse to adjust the volume level of each element. As mentioned earlier, the unique selling point of Samplitude is its object-based workflow. The multitrack editor not only allows you to work individually with each track, but also facilitates splitting each track further into multiple segments called Objects . You may individually work with each object in the track if you don’t want to apply common changes to an entire track. Big sessions in Samplitude may have you working with dozens of objects in multiple tracks. Use the Zoom-in/Zoom-out control (+, -) located at the bottom of the vertical scroll bar in Samplitude. Double-click on an object to open the object editor. Here you may individually work with FX, EQ (Equalization), fades and pitch-shifting. Any changes you make here will be exclusive to the object and the rest of the track remains unaffected. Suppose you want to perform changes only to a portion of the object, you may split a single object into two or more objects. To do this, move the timeline playhead into your desired point of separation and press T on your computer keyboard. You can move these individual objects to anywhere within the track. This easy object-based operation has given Samplitude a major edge over many of its competitors that restrict you to track-based editing. To perform traditional track-based editing, go to the track controls located on left-hand side of each track. Any changes you make here will be applied to the entire track, I.e, to each individual object in the track. You should always be very careful while using this, as you could roll-back some crucial changes made to individual objects. The S (SOLO) button on the track controls is used to activate the particular track and mute every other track in your session while playing back. The M (MUTE) button does the exact opposite by muting the particular track and activating the rest for playback. The More comprehensive track-based editing, can be done using the Track Editor. Invoke the track editor from the VIEW menu. The editor appears on the left-hand side of your traditional track controls.     The track editor features a vertical volume fader and a knob-controller to adjust the stereo settings of your selected track. You can also make various other adjustments with the track editor including EQ and Plugin settings. Th e Plugin browser in the track editor allows access to all the plugins and effects. However, you should be careful again here, as any change you make here will be applied to all the objects in the track, rolling back adjustments you ha d made to individual objects. We have demonstrated the Samplitude interface with an existing demo session. Now let us see how you create a new project. Any Windows user would have guessed it right! Yes, go to your File Menu , and click on New Virtual Project. Alternately you can use your keyboard shortcut, E. In the next Window, select the number of tracks you need on your project session, name the project and click OK. An empty Samplitude session will be loaded. Make sure you have the appropriate input settings before you start working on the project. Click on the Y key on your computer keyboard to load the Audio Setup Window. Select the Magix Low Latency Driver as your driver system. From the MIDI tab , select the MIDI keyboard that you are intending to use for MIDI input in this project. You may also traverse through the Recording and Playback tabs to assign appropriate input and output devices. You have an empty multi-track Samplitude session. To load an existing audio track to the session, select the track where you want to load it to, go to the File Menu and select Load Audio File. You can alternately use the keyboard shortcut W. In the next Window, select the Audio file you want to load on to your track. If you have selected multiple tracks, you may decide the sequence/order of their placement in your track. You may be eager to work with Virtual Instruments. Select the track where you want to work with MIDI tracks. On the track controls, go to Add Plugins and clik on the inverted arrow symbol. From the MENU that pops up, select Plugin Browser. This browser gives you access to all the Instruments and Effects plugins. Click on Instruments and select from the available virtual instruments. In the Instrument Window, you can make additional adjustments and play the virtual instrument using the on-screen keyboard or your MIDI keyboard, if connected. You may prefer to RECORD the Virtual Instrument directly using the MIDI recording feature. To do this, click on the RECORD BUTTON on the track controls to arm the recording. Once you are ready to record, click on the RECORD BUTTON on the Transport Controls. Click on the CLICK button to turn on the metronome , to enable click tracks while recording. Your MIDI input will be recorded to the assigned track on the timeline. Audio too is not very different. Before you arm you recording on the track controls, right-click on the record button (on the track controls) and select the appropriate Audio Input. After this, left-click on the record button to arm your recording. Once you are ready to record, click on the RECORD BUTTON on the Transport Controls.    

Getting Started with Magix Music Maker

11/30/2020
Introduction to Magix Music Maker   Magix Music Maker is one of the most popular DAWs that exist today, that has maintained a consistent user-base of more than 2 million for the past few years. It is one of the earliest DAWs in the world having debuted in 1994. Twenty six years after its debut and the target user remains the same; the beginner. Just like some of the modern smartphone applications that allow users with absolutely no music training to produce music, Music Maker has allowed anybody with an interest in music to start producing their own little compositions on their Windows computers since its early days. It has never been a professional DAW, and was never intended to be one. In fact, the Music Maker a was based on Samplitude, the full-fledged professional DAW from Magix. It was intended to be a miniature consumer version of Samplitude, just like how GarageBand was designed to be a scaled down consumer variant of Apple’s Logic Pro. However it isn’t anywhere as comprehensive or intricate as GarageBand. It is just good enough to get a complete novice started with music production. It is precisely an amateur’s possession, more inclined to preset-based music creation. The best way a novice can get started is to be creative with the existing presets, trying to make unique combinations, layering them, adding effects and mixing them. Music Maker is the perfect choice for a Windows user as it easily facilitates all of these. It comes with a large collection of presets and samples besides allowing you to purchase additional ones from Magix itself at favorable prices. Magix offers the latest version of Music Maker in three editions; Magix Music Maker Free, Magix Music Maker Plus and Magix Music Maker Premium.   Let us take an introductory tour of the latest version of Magix Music Maker: This interface of the latest version of Music Maker looks familiar to those who have worked on other DAWs. For newbies too, this looks interesting as it has a keyboard loaded at the bottom, as you enter the interface unlike most of its alternatives. If you are intending to give audio and MIDI inputs in your Music Maker session, then you should ensure that the input settings are appropriate. To do this, click on the Program Settings icon adjacent to the File Menu. In the Program Settings Window, select the Audio/MIDI tab. O n the left side you have your Audio settings, and on the right you have your MIDI settings. On the Audio settings section, go to DRIVER SELECTION and select ASIO driver and choose from the list of audio interfaces. On the MIDI section, go to INPUT DEVICE and choose from the list of MIDI input devices. As a beginner, you needn’t bother about the other settings in this Window now. Once you have ensured that the right Audio and MIDI input devices have been assigned, click OK to get started.   T he right hand-side of the interface contains a panel that has the instrument tab active by default. This tab holds all the virtual instruments that come with Music Maker. You select from these instruments while recording MIDI tracks. The tab towards its left contains all the built-in loops that come with Music Maker. This large collection of loops is where most of the beginners would love to spend their first few weeks with Music Maker. You may drag and drop these loop presets to your timeline and create audio tracks straightaway. The panel also holds your file manager and download tabs. Instead of starting off the traditional way by trying to toy with the built-in loops in Music Maker, l et us straightaway start recording an instrument. To do this, go to the appropriate track on the timeline that you want your instrument to be recorded to, and click on the RECORD button. An important thing to be noted here is that, unlike most other DAWs, you don’t have to load an Audio track or a MIDI track to the timeline. An empty track loaded on to your Music Maker timeline is not an Audio track or MIDI track until the user decides to provide input. So once you click the record button, it will either say MIDI RECORDING or AUDIO RECORDING. Click again to switch your track type. Let try recording with guitar, since it allows us to work with effects and plugins in Music Maker. As we are not using a MIDI instrument here, we need to make sure that the record button reads “Audio Recording”. As Loopazon recommends in articles about every DAW, do turn your CLICK TRACK on before you record, so that it allows you to nail your tempo in fewer takes. Click on the METRONOME symbol at the bottom of your timeline to enable CLICK TRACK. Make sure that you do not forget to set the tempo of your input. Click on the BPM symbol adjacent to the metronome symbol to set your tempo in Beats Per Minute (BPM). Click on the RECORD button once you are ready, and provide your input. Your audio input will be recorded to your timeline. Now that you have your guitar track recorded to your timeline, let us try to add effects. You may already be aware that most of the guitar tracks recorded to DAWs have their tones augmented using software amplifiers that are either part of the DAW package or paid third-party plug-ins. Let us try applying an amp to our guitar track. Do click on the FX button in the track controls From the various options, click on Audio FX Rack Track and choose Vandal SE, which is a free guitar amp simulator that come along even with the Magix Music Maker Free. From the drop-down list on the top , select the desired tone for your guitar. Although you wouldn’t be auditioning the plug-in, you may come back and change the tone anytime. Now let us record a MIDI track. Click on the RECORD button in the track controls of the track where you want to record your MIDI instrument to. Make sure that you have enabled the MIDI recording and not the audio recording. On the right-hand side of the interface, you will find all the free virtual instruments that come along with Music Maker. Click the desired instrument and drag it straightaway on to your track. This will create a MIDI clip which you may edit or delete it to record a fresh track with the assigned virtual instrument. Once you record the track, you may double-click on the track to load the piano roll.   Here you can edit the notes, change their placement and quantize them. You record multiple layers of Audio and MIDI tracks, experiment with the large collection of built-in loops and make the best of your first session on Music Maker, as by now you would have certainly discovered how easily you can do a basic level of music production on the application. Exporting your audio file is almost as simple as saving any file on your regular Windows applications. Go to the File Menu, select EXPORT and choose your desired audio format from the sub-menu. Save the file to your desired destin a tion folder.

Getting started with Acid Pro

11/25/2020
We did take a tour of the latest version of Sound Forge Audio Studio from Magix. Acid Pro is a highly efficient, user-friendly and relatively inexpensive DAW from the same stable. In fact Acid has been a Sound Forge sibling since their Sonic Foundry days. The DAW pretty much shared its fate with Sound Forge, initially struggling, subsequently flourishing and then languishing under multiple ownerships. The initial versions of Sound Forge written solely by Monty Schmidt were considered a major breakthrough among software developers and soon attracted investment from Microsoft techie Curtis J Palmer. After Palmer’s purchase of 50% stake in Sonic Foundry, the freshly incorporated startup commenced the development Acid PRO, one of the earliest mainstream Digital Audio Workstations. Unlike Sound Forge, the first version of Acid PRO had five developers working on it, including Schmidt at the helm. The first official release happened in 1998, when Cubase was on its rise. The unique selling point of Acid PRO was its loop-based music-sequencer that enabled quick drag and drop of Acid loops to any song. An Acid loop could adjust itself to the tempo of the song and surprisingly there was hardly any perceptible sonic degradation. Acid PRO is one of the best DAWs for beginners to start their journey in music production. While similar DAWs come at twice its cost, the Acid PRO 10 would just cost you almost the same as Logic Pro X. While Apple has held the reputation of selling Logic PRO, one of the world’s best DAWs at almost a third the price of its biggest competitor Cubase, the application has remained a privilege of Apple users. Most of the student level music producers find the Apple hardware prohibitively expensive. The best option for them is to go for a reasonably configured Windows PC and get an affordable DAW like REAPER or Acid PRO. While REAPER’s non-commercial license is available at an unbelievably low-price, you may have to shell out extra bucks to get VSTs, loops and samples. This leaves you with Acid PRO as the best Windows alternative of Logic PRO X. A cheaper version called the Acid Music Studio is also available though Loopazon strongly recommends the fully-loaded Acid PRO. Even the earliest versions of ACID were incredibly user-friendly allowing its users to easily and quickly do loop-based and sample-based music production. However, like Sound Forge, Acid PRO entered a period of stagnation in the late 2000s, precisely less than five years after the acquisition by Sony. Sony offered its final update of Acid PRO in 2008 and the DAW wouldn’t see another update for the next ten years. In the mid-2000s, Sony sold off its Sony Creative Software assets including Sound Forge and Acid PRO to famed German multimedia software company, Magix GmbH. This raised hopes among Acid PRO fans about a probable revival of their favorite music production software, since Magix was the company that produced the Magix Music Maker, one of the earliest digital audio workstations (DAWs) in the early 90s. Multiple efforts were made by many such fans to reach out to Magix and persuade them to revive Acid PRO. Thankfully their efforts didn’t go in vain. Magix brought the Acid PRO back to the mainstream by releasing the Acid PRO 8 in spring 2018. The modern versions from Magix comes with around 9 GB of built-in loops, an incredibly vast library considering the price of the application. Magix continues the tradition of Acid PRO, making it available exclusively for Windows users. You need a 64-bit Windows operating system to use it. Despite speculation among enthusiasts, there has been no official update regarding a possible Windows or Linux variant yet. Let us take an introductory tour of Acid PRO 10: This above screenshot of the Acid PRO might sedem very familiar if you have toyed with Sound Forge before. Even if you are totally new to audio or music production, you would have sighed in relief on your first glance at the interface. It doesn’t look intimidating for a newbie unlike some of its competitors. Twenty two years after its debut, the one thing that remains unchanged despiete multiple ownerships, is its minimalistic interface. A rookie could be off to a flying start, confidently working on his first track in a matter of hours. To open a new project, click on the green icon located under the menu bar. Alternately you can do this by the Conrol, Shift and N keys on your keyboard simultaneously.   The bottom-left portion of the interface has the file-browser that lets you traverse through the various files and folders in your system or externally connected drives, minimizing your Acid PRO session. You may simple drag and drop the desired audio file directly to the timeline. Acid PRO would automatically create an Audio track. Just like its Apple counterparts Logic Pro and GarageBand, Acid PRO has two types of tracks; viz. Audio track and MIDI track. An audio track is any traditional file in traditional audio formats like MP3, WAV etc. This could be your loops, samples or excerpts from other tracks that you want to edit or use in your ACD proje c t. A MIDI track is for your software instrument and synth inputs from a MID I device like a keyboard or a drum machine. Like Logic Pro, GarageBand and other mainstream DAWs, Acid PRO doesn’t allow you to have Audio and MIDI information on the same track. Your track controls are on the left-side of each track. The scale above displays the timecodes of your track. You can move your playhead easily to your decide time-position to edit or playback from that position. The track controls too display the timecodes in their usual format and in BARS. Besides this, the track controls allow you to adjust the volume of each individual track. Below the volume control, you have the pan control where you can adjust the stereo output level of each track by dragging the slider towards the left and right, and positioning it appropriately based on your output requirement.   T he PLAY, PAUSE and STOP buttons are located on the bottom of the timeline.   These controls are self-explanatory. However, you can use your mouse to click and drag to make a selection for playback. On the left-hand side of the PLAY, PAUSE and STOP controls are the Tempo and Time Signatures. Even if you already have multiple tracks in your timeline, you may adjust the tempo of your track by using this slider: The S button on located on the extreme-right of your track controls is the SOLO button, which allows you to playback the particular track, automatically muting every other track in the session. The M button towards its left does the exact opposite. It mutes the particular track during playback. The changes would be reflected on the Mixing Console on the bottom right part of the interface. You can make the changes directly on the Mixing Console too. Here you also have the Master Track holding combined information of every track in the timeline.   T he draw tool can be used to select, edit and move portions on your track. Just as with Sound Forge, you may split a single track in two or three regions to facilitate smoother and more intricate editing. To do this, position your playhead on the desired point of separation and simply hit the S key on your computer keyboard. To expand or shorten a region or a track, place your cursor on the opening or closing edge of the region and perform a simple click and drag operation. Just as with we did in Sound Forge, you may want to add EFFECTS to your track. Click on the FX symbol on your track. From the list of effects, choose your desired EFFECT and click on ADD. You can ADD multiple effects to the same track. Howeer let us just add REVERB here. Click OK to apply the effect(s) to your track. Each effect is a plugin that allows you to make adjustments based on your requirement. You can also add a common effect to the all the audio tracks in the project by applying an effect to the Master track (on the mixing console.   Now you may not want to limit yourself to working with audio tracks. You may straightaway want to start producing music with MIDI tracks. As mentioned above, MIDI and Audio information cannot co-exist on a single track. Thus you need to insert a new MIDI track. Right-click on your timeline and select Insert new MIDI track. Use the DRAW tool to click and drag to create a MIDI clip on your timeline. Right-click on the MIDI clip to go to CLIP properties to open your piano-roll. Alternately, you can just press G on your computer keyboard, which would directly create a piano roll on your timeline where you can use the draw tool to click and drag to create your own sequence of notes.         The default instrument in a Piano roll is the Piano itself from the DLS Soft Synthesizer. However, with MIDI tracks you would want to work with multiple instruments. Go to the tracki controls and click here: Select Insert Soft Synth. Select from among the soft synth packages, each containing a collection several soft synth instruments. Open one of them and traverse through the instruments it contains. You may audition them before applying to your track by clicking on the piano-roll on the plugin. While the MIDI tracks too are listed in the Mixing Console like the audio tracks, each synthesizer exists as a Bus track. To EXPORT your session as an Audio File, go to the File Menu and click on Render As. Choose the desired audio format and click on SAVE. You may want to come back and rework on the composition later. Thus, you need to save you Acid Pro session. Go back to the File menu and click on Save As. Your session will be saved as an Acid Pro project with a .acd extension.   Well, those are the fundamentals of Acid PRO. As you explore more, you would find a lot more features. Some of them are quite addictive making the Acid PRO a favorite among Djs and Remix producers.              

Geting Started with Sound Forge

11/18/2020
We did discuss at length about Adobe Audition, the undisputed leader in the desktop sound editing realm. The application has remained the industry standard for close to two decades now, with its popularity burgeoning after the acquisition by Adobe in the early 2000s. One of its best alternatives since early days has been Sound Forge, which was largely overshadowed by the overwhelming popularity of Audition. Nevertheless Sound Forge has remained one of the best dedicated waveform editing suites. Having initially struggled, later flourished and then languished under multiple ownerships, Sound Forge has a long history and continues to exist as a favorite among audio editors and enthusiasts at all levels. Dozens of audio editing softwares have hit the mainstream over the last two decades, with many of them being so feature-rich, exhibiting almost DAW-level capability. However, Sound Forge continues to serve as a user-friendly, utilitarian choice for many veterans as well as budding audio editors. The application was developed by Madison-based software-maker Sonic Foundry in the early nineties. It was initially designed to work exclusively on the Windows platform. The initial versions were almost completely written by Monty Schmidt, the founder of Sonic Foundry. Schmidt’s accomplishment was almost a quantum-leap during the time, when flawless recording and mixing of sounds on personal computers seemed to be a thing that was still years away. During his stint as an ultrasonic equipment designer at Madison-based Lunar Corp., Schmidt heard about the SoundBlast audiocard that maximized the prospects of recording and editing sound on personal computers. He quickly started writing an application that would enable recording, editing and mixing of music and subsequently founded the startup, Sonic Foundry. He soon started selling early versions of Sound Forge for $25. Soon, the application attracted the attention of Curtis J. Palmer, a software developer at Microsoft. Schmidt coaxed Palmer into buying stake in the company. Macromedia licensed one of its versions to offer a customized version of Sound Forge as a part of its software suite Macromedia Director Multimedia Studio . However, things weren’t going very smooth for folks at Sonic Foundry. Sound Forge being a Windows-exclusive sound editing application pulled them back from reaching out to a larger market, as most professional music producers and audio engineers were working on Apple’s Macintosh platform. The Macromedia deal that was sealed in the mid-nineties helped the company sustain and eventually turn profitable. However subsequent bundling deals couldn’t help the company sustain for long. With losses mounting beyond comprehensible limits, Sonic Foundry was forced to sell off its flagship desktop products, Sound Forge and Acid PRO to Sony Pictures Digital at a whopping $18 million. Under Sony’s newly-formed subsidiary Sony Create Software, Sound Forge flourished among other applications for some years until it entered a period of stagnation in the early 2010s. In 2016, Sony sold its subsidiary to Magix Software GmbH. After several years of stagnation, yet never ceasing to exist, Sound Forge along with former Sonic Foundry sibling Acid PRO, found its most appropriate home at Magix. Unlike Sony, the German software giant has a legacy of more than two decades, having produced popular multimedia applications since the early nineties including the largely popular Samplitude and Magix Music Maker. The current stable versions of Sound Forge were released a few months, as two editions; viz. Sound Forge Pro 14 and Sound Forge Audio Studio 14 . Let us take an introductory tour of 14 Sound Forge Pro. We shall be working on the Podcast layout. Beside the default layout, there are several other layers you could switch to, that includes the Stereo Recording, Audio Editing, Mastering etc., each of these being preferred by editors purely on the basis of their comfort level. Go to the VIEW menu and select Windows Layout and choose from the several layouts available. You would eventually find your most comfortable layout. Here is how the Podcast Layout looks: Let us start toying with Sound Forge by trying out one of its most fundamental functionalities. RECORDING: Go to the FILE menu and select NEW. Sound Forge will prompt you with the following window: Here you select your sample rate, bit-depth and input channel(s). If you want CD quality audio, the suggested sample rate is 44100, while the standard bit-depth is 16-bit. Once this is done, you need to check your audio settings before you attempt any recording. This is to ensure that the correct input device has been assigned. To do this, go to the Options Menu and select preferences. There is hardly anything complicated here as an average Windows user would find this very familiar. It is your standard audio settings window. Go to the Audio tab. Select the RECORD tab and check whether the correct input device has been assigned to the channel. Click OK once you have the appropriate device assigned to your input channel. You are now ready to RECORD your input. Click on the RECORD button to start providing audio input through your device. While recording, it is highly recommended that you use the MARKER function, whenever you feel that you have made an error or there is a slight imperfection. These MARKERS facilitate easier editing later. To use the marker, you just need to hit the M key on your keyboard, whenever you make an error while recording. The marked portions in the audio will be listed in the bottom right panel of the SoundForge interface. Clicking the listed markings in the list, you may directly jump to that portion during the edit. If you forget to do the marking while recording, you may do it in the editing stage. Click on the STOP button once you are done with recording. You have performed the most basic function of SoundForge, RECORDING. And certainly you are waiting to edit your audio recording and add effects to it. Let us explore some basic editing that can be done to the audio besides adding effects to it. You will find the EVENT TOOL among various others, right below the Menu bar. Click on it to start editing your audio. Once the event tool is enabled, you can manually control and edit your audio waveform using the cursor. For instance, if you want to split the audio file into two parts, so that you may control and edit them separately, right click on the intended area of separation and choose SPLIT. Now you can independently perform edits to these individual regions. You may also drag them back and forth, or even create overlaps wherein SoundForge would automatically create a crossfade. You mayjust the crossfade levels by pulling the curves with your cursor. Even without creating an overlap, you may add Fade-in and Fade-Out by clicking on the top edge of the region and dragging your cursor to create a fade-in/fade-out curve. To add an EFFECT to your audio track, use your cursor to select the region/portion in the track where you want the effect to be applied. Go to the EFFECTS menu or FX Favorites menu to choose the effect that you want to apply to your track. For instance, if you want to add a REVERB to your audio, go to the EFFECTS menu after making the region selection and then click on REVERB. In the effects window Choose from the PRESETS. Click on PREVIEW to listen to the effect on your audio, before applying it. Once you are satisfied, Click OK. The difference between EFFECTS and FX FAVORITES is that, the EFFECTS menu contains all your built-in Sound Forge effects while the FX FAVORITES would contain all your third-party fx plugins. Though SoundForge hasn’t been your traditional multitrack audio editor, it does allow you to additional layers of audio to your recording. By this you would combine two audio sources into a single track. This is helpful when you are doing podcasts wherein you may want to add background music to your vocal recording. The bottom-left portion of your SoundForge interface contains the File Browser. You may use this to browse through the folders in your system without exiting the SoundForge interface. You may find an appropriate audio file for layering your audio with, and drag and drop it into SoundForge. Please note that SoundForge does not add the audio file to your existing track. Instead it creates a new audio file. You may notice a new tab being created on top of your File Browser. You may switch between these separate audio sessions by clicking on the tabs. Click and drag over the source audio to select the portion you want to copy. Click CTRL+C and switch to the destination audio tab. Click on the desired region on the destination audio track, to paste the new audio. The most important thing to note here is that, you should not directly perform a PASTE (CTRL+V) here. This would OVERWRITE the existing audio. Our intention is to blend both these audio tracks. Hence, go to the EDIT menu, select PASTE SPECIAL and click on Me. You may perform the same operation with a CTRL+M keyboard shortcut. Sound Forge will now prompt you with a Mix/Replace window. Here, you shall adjust the volume levels of the source and destination audios. In most instances, the source audio is set to a lower volume level, especially if you are intending it as background music for your vocal recording. Click you PREVIEW while making the adjustments so that you can listen to the change before applying it. Once satisfied, click OK. Your audio will successfully be blended with the destination audio exactly as you intended. To SAVE your session, click on SAVE AS and select the default Sound Forge Audio Studio format and save it to your desired destination folder. This would enable you to comeback to your session and make changes in the future. To export it as an audio file, click on SAVE AS, select from among the standard audio formats like WAV and MP3 and save it to your desired destination folder. So that much would be good enough to get you started with the legendary Sound Forge .

An introductory Glimpse into Adobe Audition

11/08/2020
An introductory Glimpse into Adobe Audition Since Adobe’s acquisition in the early 2000s, Audition (formerly Cool Edit Pro) has been the undisputed industry standard for audio editing, mixing and processing. Ambitious young software developers David Johnston and Robert Ellison left their lucrative career at Microsoft behind and founded Syntrillium Software in the ‘90s. Their flagship software product was the Cool Edit (which subsequently became the Cool Edit Pro). The audio editing application developed for the Windows operating system was equipped with only basic functionalities and could not handle multiple tracks. However, Syntrillium was quick to launch subsequent versions with multiple-track support, noise reduction etc. Cool Edit Pro also allowed import and export of codecs for almost every popular audio format then, including MP3, MPEG-1 Audio, AAC, AIFF, FLAC, Ogg, Dolby AC3 and WMA. Adobe’s purchase of Cool Edit Pro for a whopping $16.5 million became a major turning point. The application has since been so ubiquitous among audio engineers at all levels. Every audio engineer would have used or at least tried the Adobe Audition at some point in his/her career. Arguably among the most comprehensive audio editing applications today, Audition facilitates seamless handling, editing and processing of multi-track audio across various formats. You don’t need to equip yourself with expensive heavily configured hardware to smoothly run Audition as Adobe only recommends a bare minimum of 4 GB RAM and 4 GB hard-disk space. Your home PC or laptop with this recommended configuration or above would suffice to get your started with Adobe Audition. Adobe has not released a Linux-supporting variant yet. The application is currently available for Windows and Mac operating systems. The generally non-destructive edit and mix application also features a waveform view for editing which is destructive , making the changes you make there permanent, just like how it was when working with analog tapes. The Audition interface is fairly user-friendly. However if you have no previous editing experience, it could take a few sessions for you to get comfortable with it. Nevertheless, the application lends you stability and versatility second to none, that you would never contemplate trying out alternatives once you get used to its interface. Let us get started with the interface: On the left hand side of your interface, you will find the FILES panel which lists all the audio files that are open in your Audition session. We are in the WaveForm view. Below the FILES panel, is your Media Browser that lets you traverse through the various folders and files in your system, simultaneously allowing you to audition the audio files by clicking on them. Beside the media browser is the Effects Rack that contains several built-in presets (audio fx) that could be added to you audio. Even if you record a a fairly noiseless input that sounds good, you may want to add some basic effects to it, like REVERB, EQ etc. Say for instance you want to add REVERB to your input. Go to the Effects Rack, click on the arrow mark on your track and select REVERB and choose the type of reverb you want in your input. The various types of reverbs available on Audition are Convulation Reverb, Studio Reverb, Full Reverb, Surround Reverb etc. After selecting the appropriate reverb effect for you track, you may adjust the reverb levels on the next window and click on APPLY. Even if you record a flawless audio input, the additional audio files you may import to edit may not necessarily be as noiseless and clean. It is thus necessary to remove the background noise in such audio files, and this can easily be done on Adobe Audition. There are multiple ways to remove noise, however the DeNoise plugin can remove a significant amount of background noise in most audio files. Go to the EFFECTS menu and select Noise Reduction /Restoration and click on DeNoise from the Sub-menu. The following window appears, where you can manually adjust the noise levels. Below the Media Browser and Effects Rack panel, you’ll find HISTORY where you can track all the actions that have been performed to your audio. Beside HISTORY, you will find the VIDEO tab that allows you to work with the videos you have imported to your Audition session. Make sure that your AUTOPLAY button is enabled, so that you can listen to the audio files before using them in your Audition session. Drag and Drop the audio file you want, to your Audition workspace. The very first thing to do once you open the Audition interface is to configure your audio interface for recording (input) and playback (output). Go to the Adobe Audition menu (On Mac) or the Edit menu (On Windows) and select PREFERENCES. On the PREFERENCES window, select Audio Hardware. Select your INPUT and OUTPUT devices here. Also click on Audio Recording on the PREFERENCES window to confirm whether your left and right channels on the stereo input have the same input device selected. Do check the same for your stereo output. Once this is done, you are ready to record audio on Adobe Audition. You’ll find the RECORD button at the bottom of the interface. Click on it when you are ready to record (Alternately you may press the SHIFT key and spacebar on your keyboard simultaneously to enable RECORDING). Once you hit the RECORD button, Audition will prompt you with the New Audio File window where you name your audio file, select your sample rate. Generally the sample rate of an audio input is set to 44100. The bit-depth which would by default be 32-float on Audition is recommended to be kept so. Click OK once this is done and straightaway any audio input from the selected input device will be recorded onto your Audition session. If you want to make any adjustment to your input volume, do it on your external audio interface. Make sure your volume is not too high. Volume levels beyond the -6dB limit would produce distortion. Hit the spacebar on your keyboard, or click on the STOP button to stop your current recording. We have so far been working on the WaveFrom view, which is the default view on Adobe Audition. Audition offers an alternate view for editing which could possibly end up being the preference for at least some of you, mainly because of its non-destructive nature which allows you to undo and rollback the editorial changes you have made to your audio. Those of you who have worked with other audio editing applications may feel at home, in the multi-track view. The multitrack view facilitates a much faster workflow while editing and mixing different audio tracks, especially music. To create your new multitrack session, go to the top-left area of the Audition interface and click MULTITRACK (beside WaveForm). Audition prompts you with a window called New Multitrack Session. Name your file here and set your sample rate to 44100 and select stereo multitrack if you would have music in your session. Click OK and you are presented with the multiotrack view: Here you can drag and drop audio files from the Media Browser. The non-destructive mode allows you to work with multiple tracks while constantly making changes to them. You may have an audio input on one track, music on another. If you want to add Effects , you may select the respective track on the Effects Menu and follow the same steps mentioned earlier (while discussing the WaveForm view). The track controls are as usual, on the left-hand side of each track. You can manually adjust the volume levels of each track by dragging your cursor over the lines on the track. Once you are done with you work on the multi-track session, you may mix-down the session to a new file. To do this, click on the Multi-track Menu and select Mix-down session to New file and select Entire Session from the sub-menu. You can EXPORT the audio just like you save any other file your Windows application. Go to File, Click Save As, and then name your file , choose your destination folder and Click OK. Now, you would have a fair level of basic knowledge to get started with Adobe Audition. Start exploring!

Beginner’s glimpse into the Studio One interface

10/07/2020
Beginner’s glimpse into the Studio One interface   Ableton’s Live, Apple Inc’s Logic Pro X and Steinberg’s Cubase are the world’s most prominent DAWs. This is a unanimously accepted fact! Then there are the lighter ones like Reaper, FL Studio and GarageBand that are favorites among beginners and intermediate level music producers. Amidst these mighty market leaders, the Studio One from PreSonus has been silently making inroads into the market over the past few years. Ever since its debut in late-2009, word of mouth has been proliferating among music producers around the world about its highly user-friendly interface. The latest versions have leaped ahead of several mainstream competitors with the enhanced drag and drop feature that facilitates an incredibly fast workflow. This makes it equally ideal for both studio and stage environments. Though Studio One debuted in 2009, its legacy dates back to the late 90s. Matthias Juwan’s 1999 university thesis project KRISTAL (officially released as KRISTAL Audio Engine) became the basis for Studio One. Codenamed K2 , the development of the next generation KRISTAL commenced in 2004. Shortly, Juwan co-founded the company KristalLabs Software Ltd. wi th former Steinberg employee Wolfgang Kundrus. The source code and development of K2 were licensed to the company thoug h the ownership of the original KRISTAL software wasn’t acquired . Kundrus who was among the early developers of Cubase teamed up with Juwan to head the development of K2, aiming to produce a streamlined and versatile DAW. Subsequently, KristalLabs found support from American tech giant PreSonus. Development was accelerated and K2 was soon rechristened as Studio One. By the time a stable version of the application was ready to debut, KristalLabs had become a subsidiary of PreSonus. The DAW was compatible with both Windows and Mac platforms. Version 1 saw several revisions and updates till 2011. Version 2 released in 2011, with the integration of Melodyne being a major breakthrough. Melodyne being an expensive standalone pitch-correction software was now available as a part of the Studio One package. The development of the ARA (Audio Random Access) plugin facilitated this.   P reSonus offers three variants of StudioOne to its users. The Prime version comes with a free license and is ideal for beginners as a gestating platform before purchasing an Artist or Professional license. You would be required to upgrade to the Arrtist of Professional to avail some of the professional features. The Artist edition is fairly feature-rich. However, it only offers a trial version of Melodyne while various other features like Groove Delay, IR Maker and Open Air are totally absent. The Professional edition is the fully-loaded version of Studio One. PreSonus offers a subscription package at $15 approximatrely per month or $164 per annum. The Studio One Professional version is among the various other software tools available with the package. If you don’t want to subscribe, you have the option make a one-time payment and purchase the Studio One license. The fully loaded Professional edition priced at almost $400 is much cheaper than Steinberg’s Cubase Pro or FL Studio. However Apple poses a challenge to PreSonus, having priced the Logic Pro X at $200. However, being compatible with both Windows and Mac gives the Studio One and edge. Let is get started with the Studio One interface.   T he Start Page greets you once you open the application. Clicking on the Songs, Projects or Shows tabs will list the saved items in the respective categories.   To setup your audio interface, click here. Do make sure that your desired audio device is plugged in. In the next window, select your audio interface in the audio device tab. Now you are ready to create a new song. Click on the NEW SONG icon on the top-left side of the start screen.   Choose EMPTY SONG and NAME your file and choose its destination folder. Also choose your audio resolution and tempo. Make sure your enable the check box beside Stretch Audio File to song tempo. This ensures that any audio file you import to the session will be stretched to match the tempo of your song. This is one of the main reasons why Studio One asks you to set your song tempo before you enter your session. However this is only recommended for beginners. Intermediate and professional level users would prefer importing audio files with similar tempo, as alteration to the imported file could affect its sound quality. This could sometimes create a conspicuous quality difference between the existing audio in your session and the tempo-matched imported audio. This is undesirable in a professional recording. Click OK to enter your Studio One session.     The Studio One interface is simple and reminiscent of many mainstream DAWs like the REAPER. However it does have its own characteristic differences and has made a lot of things easier. You may already be feeling at home if you have toyed with DAWs like REAPER or GarageBand. Even otherwise, the Studio One i nterface could be total fun for beginners. Similar to GarageBand , Logic Pro X and Cubase, you have Right hand side of the interface offering you all the built-in virtual instruments , effects and loops. You may hide or show this by clicking on the browse button below. Beside the Browse button, you find your mix and edit buttons. Similar to the Logic Pro X , Studio One offers an information button. Click on the ‘?’ button to enable this. Once enabled, this will display information about the various elements in Studio One once you hover your cursor over them. The information will be displayed under the toolbar in a non-intrusive way contrary to other DAWs. This tool will be helpful to new users in their first few weeks with Studio One.   We did mention about the incredibly user-friendly drag and drop feature of Studio One. You can straightaway start working on your maiden session by trying out some built-in samples or loops from the library. Unlike most of the other mainstream DAWs we have discussed, you don’t need to create a new track every time. You may omit that step and straightaway drag and drop samples from the browser to any row in the interface. Studio One automatically assigns tracks for each row. You may alternatively right-click on the track panel to create a new track. The two types of tracks in Studio One are Audio and MIDI tracks. The audio track is for audio files while the MIDI track is to work with virtual instruments.     O n the left hand side of each track, you have the track controls. The M button is for muting the particular track while playing other tracks. The S button does the exact opposite. It enables the SOLO mode. So when you press play, it automatically mutes the other tracks and plays only the SOLO- enabled track. The next one with a circle is obviously the record button. This is used to arm the track before you record a voice or an instrument. On a MIDI track, click on the piano symbol to open the instrument control. You can make manipulations to the sound and tone of the instrument manually here:     Click and drag on the instrument track to create a selection/MIDI clip. Double-click on the selection to open the piano roll.     Here you can create the sequence of note you want in your MIDI clip. C ontrary to most other mainstream DAWs, you find the PLAY, STOP and RECORD controls at the bottom of the interface. These are self-explanatory. You did set the tempo of your song on the Start screen. However if you wish to change your tempo, you may do it here.   To RECORD from an external source , add a new AUDIO TRACK.   Choose the input source for recording and click on the arm button and monitor button.   Click on the metronome button at the bottom of the interface to enable click tracks while recording. Click on the RECORD button when you are ready. Your input gets recorded on to the respective audio track on the timeline.     The symbol next to the RECORD button is the LOOP button. This is used to loop a particular selection in your track. To make the selection, move your cursor over the time ruler. Once your see the pencil button, select the bar (s) or section by clicking and dragging over it. You may also click and drag the right and left edges of the selection to extend or shrink your selection. The selected portion is often referred to as a loop region or loop range . Once the selection is made, click on the loop button to enable it. To export you track, drag and make a selection and press on CTRL + E on your keyboard. So that is about it. A quick basic glimpse into the Studio One interface for complete beginners. Those who have tried DAWs like Ableton Live, REAPER, GarageBand or Logic Pro X, or even followed Loopazon’s articles on them, wouldn’t find anything new or much different in this introductory article on Studio One . As you can see, there is a lot more left to explore in this interface. The various tools and controls deserve a separate article.

A Glimpse into REAPER for Beginners

09/27/2020
A Glimpse into REAPER for Beginners   We have discussed enough about Digital Audio Workstations. If you have been following other articles in Loopazon, by now you would be knowing that REAPER is one of the cheapest DAWs out there that also offers a very user-friendly interface, enabling anybody to try music production. Even its best alternative GarageBand which comes totally free of cost, is a privilege of those who own expensive Apple hardware. REAPER is a fairly advanced Digital Audio Workstation developed and maintained by Cockos and has profound popularity among users at all levels; amateurs, university students and music professionals. It has a 64-bit internal audio processing and allows import and rendering of audio across various formats. It has also maintained a reputation of being incredibly fast and is among the most preferred DAWs for recording audio. Some producers even prefer REAPER to Ableton Live for recording. Loopazon often turns to REAPER, for recording live instruments. The most instant attraction of REAPER though is its flexible pricing. Cockos only offers a single version of the DAW to everybody. Scaled down versions are not available. You may download a fully-functional trial version that is valid for sixty days. If you are impressed and wish to continue with the platform, you may purchase the appropriate license. If you are intending to make full-fledged professional use of the application and your annual revenue by using it exceeds $20,000, then you would be required to acquire a commercial license at $225. However, if you are an individual, an educational institution or a fledgling artist with annual revenue lesser than $20,000, the same DAW is available to you on a discounted license at $60. Unlike competitors like GarageBand and Logic Pro X, REAPER doesn’t come with an expansive built-in virtual instrument library. This is very reasonable considering the price at which the application is offered to normal users. However, professionals contemplating purchasing the commercial license at $225 may find it a little less reasonable, since Apple offers the Logic Pro X with free lifetime updates and hundreds of virtual instruments and thousands of loops at a mere $200. But you don’t need Apple’s expensive hardware for REAPER. The application is compatible with systems running Windows XP and above. This doesn’t make a significant difference to professionals who purchase the commercial license. This is because, these users become ineligible for REAPER’s discounted license as their earnings clock $20,000 per annum. The Logic Pro X is an excellent alternative for them, since the cost of acquiring Apple hardware would seldom be a concern. Let us get started with the basics of using REAPER: .   Y ou may start using the application without a MIDI controller. However if you have a MIDI controller, even if it is a small 25-key USB keyboard, it is recommended that you set it up on REAPER. A very basic playing skill would suffice to get started. Even if you start without a MIDI keyboard, most of you would ultimately graduate to using the DAW with MIDI. This is a lot quicker and professional when compared to using your QWERTY keyboard and mouse. However, worry not if you do not have one. REAPER is still a friendly tool for starters. For those having a MIDI keyboard, you m a y set it up first.   Select Preferences from the Options Menu On the left panel of the preferences window, click on the MIDI Devices option.   This above window would list all the MIDI input and output devices that are connected. However, none are listed above since we don’t have a MIDI controller plugged in now. You may plug-in your MIDI device and click on RESET all MIDI devices. Once you have done this, you may double-click on the device. On the Configure MIDI Input window, check the Enable Input From This Device option and click ok. Click OK again on the preferences window. You can directly give input from your MIDI now, without struggling with your mouse and computer keyboard and you get back to the REAPER workspace.   You can hide the MIXER by clicking CTRL + M. It may be a distraction when you are recording your tracks. You may want a clean interface and a lot of space. Let us see how to record a new track on REAPER.   P ress CTRL+T on your computer keyboard to add a new track to your session. Alternatively you may go to the Track Menu and click on the first option, Insert New Track.     Once you have added thet track, you need to arm it for recoreding, just as in Ableton Live. To do this, click on the RED button on the extreme left of the track controls (beside the speaker button)   Once you arm the track, select the input source for recording.   Just as in Cubase, do remember to set it to mono since it is a single source. Else you might find your track playing in one speaker, or one side of your headphone. So with sources like your Guitar or a microphone, always record mono and convert to stereo while exporting.   As Loopazon always recommends, make sure that you enable the click track before recording . This makes it easier to nail your performances in fewer takes. Click on the metronome button.     To start recording RECORD button at the bottom of the interface.     Your performance will be recorded to the respective track on the timeline. Press the STOP BUTTON to end the recording.     Adding Effects to Tracks As already discussed, REAPER does not come with professional VST libraries. However there is a good built-in Effects library that could be sufficient for beginners. However t o add the best effects to your tracks, we suggest you purchase the best FX libraries have them at your disposal. Else REAPER could be a disappointing experience for you, especially if you are migrating from something like the GarageBand that comes with countless guitar amps and other effects . L et us see how to add an effect to your track. For instance, if you have a vocal track, you can enhance it by adding effects like Reverb and EQ. If you have a guitar track, you would definitely want to have loads of fun toying with the amps available in sample packs.   Click on the FX button on the track control panel. To select built-in REAPER effects, you may click on Cockos and browse through the effects that by standard have their names starting with REA. You may choose from other libraries if you want to spice up your track with professional effects. Even budding guitarists may seem insatiable if you are using jaded amps on their recordings.   Importing Loops   REAPER users rely extensively on third-party libraries. The simplest way to add loops is to open your file manager and drag the audio file to the respective track on your REAPER timeline. However if you are working with a large library, you may want to audition your loops before using them, like in Logic Pro X and GarageBand. To do this, we must use a media explorer. On your computer keyboard, press CTRL, ALT and X together to open a media explorer.     This appears and works pretty much like your standard file manager. You can go to the location of your audio files and browse through each of them. Clicking on the file gives you a playback of it on the media explorer, thus letting you audition your loops before importing them to your REAPER project. Enable the REPEAT button so that the loop continues to play throughout while you are auditioning it.   If you think you have found the perfect loop for you track, drag and drop the loop to your timeline.   Rendering Your Tracks   Before EXPORTING (or rendering your track) , make an accurate selection on your timeline indicating the exact portion you want in your audio output. Click on Render under the File menu to find the various exporting options in REAPER.           These are the basics, just enough to get you started with REAPER. If you have used Ableton Live before, you may have realized that the basics of using REAPER is essentially the same. It is a much cheaper and excellent alternative to get you started with music production.    

Best Electronic Drum Kits (Top List For Beginners)

09/19/2020
Remember back in the 80’s… When electronic drum kits made their first appearance in the world of music? Disastrous …right? Well, what many folks don’t know is… In the decades since, they’ve gotten MUCH better. Some of today’s kits sound so impressive, they’re tough to distinguish from the REAL acoustic drums.

Beginner's Glimpse into Ableton Live Lite

09/14/2020
Beginner's Glimpse into Ableton Live Lite   Ableton Live is one of the top-ranked digital audio workstations (DAWs) in the world, with a No.1 ranking in many listings. This mainly owes to its capability in fitting into both studio and live environments. The application has remained the most favored DAW among turntablists. It was one of the first mainstream DAWs that enabled automatic beatmatching of songs. S ome of the best DJs in the world prefer the Ableton Live to other DAWs even today, with dozens of imitations out there. The Ableton Live is available for both Windows and Mac platforms. The internal processing is 32-bit though the Ableton applies a 64-bit summing to every single mix point. The Ableton Live Lite , is a free offering from Ableton as a gestating platform for fledgling music producers before making the full version, Ableton Live Standard their permanent tool. It is exactly what GarageBand is to the Logic Pro X. This free version often comes along with many hardware and software packages. Just like GarageBand, the Ableton Live Lite provides you with almost all the major virtual instruments, effects and workflows present in the Standard version of the application. It also allows you to import third-party plug-ins . You can start composing, recording and producing music straightaway with the Lite version, with its only notable limitation being an 8-track limit for MIDI and audio.   T he default view on the Ableton Live interface is the session view . This is what gives the Ableton an edge over many of its competitors. The session view is a boon for life performers and is very quick and easy compared to your traditional arrangement timeline. Let us quickly go through the interface. The controls on the top-left hand side of the interface are for adjusting the tempo of your track. To adjust the BPM (Beats Per Minute) you may click here and manually type in the desired BPM value: Alternatively click and drag up or down to increase or decrease the BPM value. Again if BPM values confuse you as a beginner, you may just click on the TAP button continuously to the rhythm of your song. Ableton gives you the BPM value based on your frequency of TAPS per minute. Similarly, to make changes to the time-signature of your track, you may click and type in the desired value here. This button with here with two small circles, is the Ableton metronome .   You may click it to enable the click tracks while recording or playing. As with other DAWs, we suggest you always have the metronome enabled so that you get to accurately follow your rhythm and nail your performance in fewer takes.   T hese are your PLAY, STOP and RECORD buttons that require no explanation. Just as in Logic Pro X and several other mainstream DAWs, the library can be found on the extreme left corner of the interface. For starters, this is where you can find all the built-in samples and virtual instruments you would want to use in your session. Additionally, it hosts all the third-party plug-ins you have downloaded, besides effects that can be applied to your tracks (like EQ, reverb etc.) Let us explore Ableton’s unique session view. This is one of the characteristics that has drawn thousands of live performers to this DAW over the years. This is the default view. However if you are on the arrangement view, you can go to the extreme right corner of your interface and click on the three parallel vertical lines to switch to the session view. This is how your interface would look in the session view: Please note that only the view is changing, while your session remains the same. You can work on a session with one view and press Tab to see how the same looks in the other view. A glimpse of the session view could be intimidating for those of you who have been working on other DAWs. Worry not! The session view is in fact much simpler and more fun, especially if you are jamming with fellow musicians. In the above snapshot of the session view, there are four tracks by default, two MIDI tracks and two a udio tracks, with the former enabling you to work with virtual instruments and the latter, with external audio input from microphones or guitars. You can work with several layers on a track and also add more tracks if you want. However the maximum number of tracks you can have (MIDI and Audio combined) is limited to 8 in this Lite edition of Ableton live. You can drag and drop samples and virtual instruments from the library to each individual track which hosts a number of layers in rectangular cells . Ableton calls each cell a scene . For the audio tracks, you can select from the sound effects in the library. Again, Ableton has limited the number of scenes to 8, in the Lite edition. The volume control for each track can be found on the bottom of the scenes as opposed to a traditional timeline view of DAWs where you would find the tracks arranged horizontally with controls on the left. To load the Piano roll, double-click on one of the scenes (rectangular boxes) of a MIDI track. Click on the pencil button on the top-right corner. Using the you may draw your notes on the piano roll.       I f you have migrat ed from another DAW, you can switch to the arrangement view, giving you a traditional DAW workspace. For some of you beginners who haven’t worked on other DAWs, let us see how to record a track with the arrangement view. Knowing this is highly recommended as this is the traditional pattern across mainstream DAWs, to record and produce your tracks. To switch to the arrangement view, click on the three horizontal parallel lines on the right hand side of the interface. T hose familiar with other DAWs may be quite relieved to see this traditional timeline view. However, the track details are on the right as opposed to DAWs like Logic Pro X or GarageBand, though it doesn’t make a significant difference. If you want to add more tracks, you can go to the create menu and select the type of track you want to load ( insert MIDI track or insert audio track ). Remember that you can have only up to 8 tracks in this edition. Now before you record on a track in Ableton live, you should arm that particular track. To do this, click on the circular dot on the extreme right of the selected track. Suppose you want to record on the MIDI track. Select a virtual instrument of your choice from the library and drag it onto your track.   Click on the metronome symbol to enable the click-track while recording.   Setting the metronome to a 1-bar count-in is recommended.   Click on the record symbol and the click-track plays for a bar before the recording starts. Provide your MIDI input which would be recorded on to your timeline.   Disarm the track by clicking on the same dot that you had used for arming it.   Repeat the process for your audio track. The only difference is that you don’t have to go to the library to pick an instrument as you are providing external input, like a guitar. However after recording, you can go to the library and browse through the audio effects to select your favorite amps for the guitar track. Drag it to the audio track.   To EXPORT the audio, go to the file menu and select Export Audio . In the next window, you may select your output audio format.   So, that was just a glimpse into the interface of the free version of Ableton Live 10 , one of the world’s most favored DAWs. Get your copy and start exploring!