
Logic Pro X Beginner Tips
Form a band online, promote your music, buy custom beats, sound parts, and share your Beat or Track as a Royalty Free loop with us. Collaborate to make beats online with the best loop makers from around the world on the Forum for musicians and beat makers. Keep up to date with Music News and learn from FL Studio Video Tutorials and the articles on the Blog. Free DAW Music Software downloads, VST and Instrument Packs for FL Studio, Pro Tools, Logic, Ableton, and how to use the most popular free DAW Software, Fruity Loop Plugins, MIDIs and more.
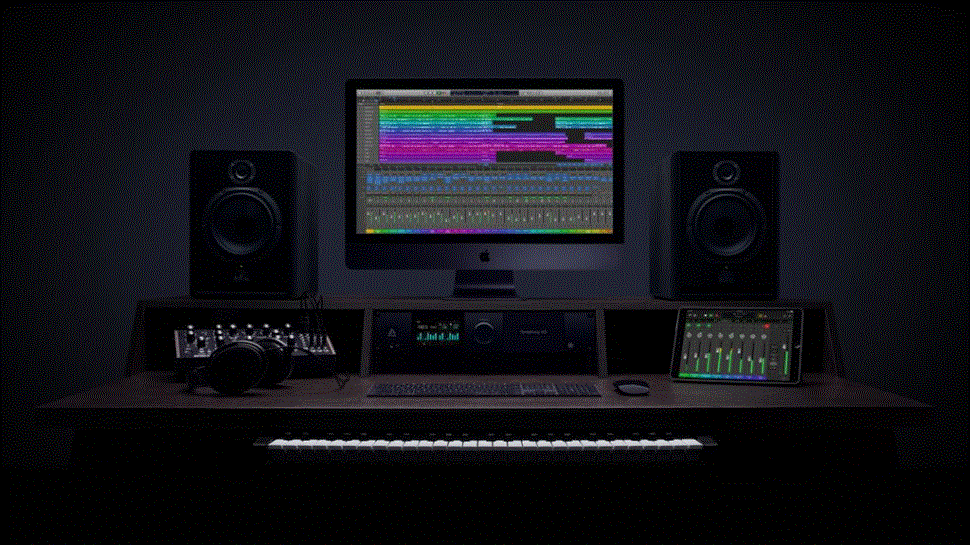
Apple’s Digital Audio Workstation, Logic X Pro, is compatible only with the Mac, but it’s stuffed with a variety of hidden operations and secret functions – let’s have a look!
Credit goes to the continuous and steady inflow of updates; the Logic X Pro is an entirely different DAW to its initial version released in 2013. The Audio Workstation’s set of features has significantly expanded since its release, transforming an excellent audio editing software into an even better one.
Moreover, the free 90-day trial is the cherry on the top. If you’ve got a Mac, you can sign up for the free trial right now and find out what it can do for yourself!
In this article, we’ve summed up all our experience with the Logic Pro X in a list of power tips, all of which will introduce you to handy features in the software and enrich your experience.
1. Alt-rock
If you want to try several different approaches to the part of a soundtrack for a specific instrument, you don’t have to work on the Solo and Mute buttons ruthlessly by making multiple copies. With Logic Pro X, you can rather try Track Alternatives; this feature enables you to audition quite a few ideas before you make your choice.

2. Brushwork

You can conveniently input MIDI notes with Apple’s Logic Pro X’s Pencil Tool. Having to click 16 times to input a series of hi-hat notes in a drum pattern can be time-consuming. The Brush Tool allows you to do this effortlessly. It enables you to ‘paint’ rows of notes by clicking and dragging the cursor.
3. Chase revere
Originally, the Logic Pro X does not playback MIDI notes if the playback bar does not pass through its start. This can be irritating if a loop is set up in the mid of a track that contains notes starting before the loop start point. But you can fix this! All you need to do is:
- Go to File
- Select Project Settings
- Select MIDI and click Chase
- Check the Notes checkbox located at the top and then the Chase on Cycle Jump checkbox at the bottom
4. Jump and Skip
Experimenting with the structure of a soundtrack by skipping or jumping from one part in the track to another can be exciting. You don’t have to delete all that is in between the two segments you want to play. Instead, you can cycle the portion you want to skip and reverse locator positions. This way, playback will skip the section, and you can experiment without having to delete anything.
5. Record without recording
Turn Capture Recording on, and everything played by you while not recording can be made into a clip. Turn it on by right-clicking the grey-colored Control bar located at the top, select ‘Customize Control Bar and Display,’ and then click on ‘Capture Recording.’ You will now see an additional record button along with the main recording button. Press it whenever you want, and all that you play will be recorded in the recorded area.
6. Peripheral vision
When you move from an individual instrument track to another, making alterations to the key parameters on the go, the synth plugin window on the first track remains active even as you move to another track. This means you have to open and close GUIs constantly. To avoid this, simply click on the purple button at the top-right corner of the synth plugin window; this way, the instrument track you are currently on will always be in front of you.
7. Stacked
Mixing tracks is made much easier when you can group complementary soundtracks together using Logic Pro X’s Track Stacks feature. All at once, all your drums will be able to share one fader, and any auxiliary effect added to Stacks will apply to all the sounds inside them similarly. Just choose the particular tracks you want to be stacked and right-click to select the ‘Stack’ option.
8. Alternative comedy
You no longer have to save multiple projects separately with different titles for the several versions you may be working on. Instead, you can save them as Project Alternatives. Go to File and then select project alternatives. This will keep all the plugins related to a project active, so it is easier than having to load a new session altogether.
9. Decreasing latency
When you’ve got more than a few plugins running at the same time, which may include lookahead-compatible plugins like Logic Pro X’s own Adaptive Limiter on the stereo output, the software may start to lag. Notes that you play on the keyboard may suddenly begin to lag, with a noticeable gap between triggers and respective sounds being heard. To solve this problem, select the Customize Control Bar option and switch on the Low Latency Mode. Do this whenever you want to add sound notes to an already busy project.
10. Importing
You might want to import a sound, some MIDI notes or automation data, or even the entire channel setup from a separate project. Importing stuff like this can be a bit tricky; here is how you can master the art of importing:
Step 1:
We’ll start with a simple sequence that incorporates pulsing sub-bass, a beat loop, a plucked synth line, and a Solina-style string line. If we wish to add something in here that we created in a separate project, here’s what we will do.

Step 2:
The relevant tracks can be browsed without leaving the on-going project. Click on Browsers in the top-right corner, and select All Files. Now we can navigate to the preferred location and double-click to add the desired Logic Pro X project.

Step 3:
Now, click on the Content for the sounds you want to add. If you prefer, you can add the automation and auxiliary effects you have used in the older project too, after choosing the sounds, click on Add. The selected sections from the earlier project will then be added to your on-going project – you can move, edit, and place them as you like.

11. Collapse Mode
During beats programming, handling notes that are octaves apart in the Note Editor can be a frustrating experience. Examples of such notes can be a crash cymbal on G4 and a pattern with a kick on C1. After including all the notes that you need in the whole pattern, click on the Collapse Mode, this will omit all the unused note lanes from the interface.
12. Smart Controls
Unless you want to work with parameters that are not usually covered by default dials, Smart Controls can be very handy for you. In order to edit selections, click ‘i’ in the top-left corner of the Smart Controls window, and then click on the dial you wish to reassign and navigate through the parameters that are available for it.
13. Flex appeal
An excellent way to produce glitchy, weird beats is by enabling Flex Mode and choosing Tempophone as the Flex algorithm. Click on the audio area to make Flex Markers and then pull them around, high and low-speed sections are created in the process. Later try changing the Grain Size located on the left-hand side; this makes your beats sound like they’re being hit by grains of sand.
14. Multichannel management

While operating with third-party multichannel plugins, for example, NI’s Kontakt, you may want to host more than a few instruments at once. You can match every instrument with its respective MIDI channel by choosing it on the Inspector’s left side; to assign the next created track to the next MIDI channel automatically, click on ‘track,’ then choose ‘Other’ and select the ‘New Track With Next MIDI Channel’ option.
15. Stretching Notes
Suppose that you have recorded a MIDI sequence that comprises of a sequence of short notes, you suddenly decide to make each note sustain until the next note starts playing. You don’t have to manually adjust the length of each note to do this; simply open the Note Editor and select all the notes, next click on ‘Edit,’ then ‘Trim,’ and finally ‘Note End To Following Notes’ (Force Legato).
16. MIDI Compression
Often times, the action of the controller keyboard may not suit the real-time performance of a part being played. Rather than meticulously limiting high ones and increasing low velocities, allow the Velocity Processor MIDI feature to do the tough work for you. Just like a MIDI Compressor, the Velocity Processor lets you choose a ‘Threshold,’ above this threshold, a set ‘Ratio’ automatically decides the extent of velocity decrease.
17. Dual automation
Logic’s automation feature enables you to create automation for both individual sections or whole tracks. For instance, if you wish to make the same filter movement repeat for each synth sequence bar, choose ‘Region Automation.’ In contrast, if you want to make the synth to, for example, fade in and out over a more extended period, then the curve would have to be drawn in the ‘Track Automation’ mode.
18. Pitch perfect
Together with its time-correcting Flex Modes, Logic Pro X offers Flex Pitch. Flex Pitch is the DAW’s Melodyne-style pitch corrector system. We recommend acquainting yourself with ‘hot spots’ around edges of detected notes, as these hotspots control various other parameters. Pitch Drift, Vibrato amount, Fine Tune, and even Volume per note, all can be adjusted over here. All of it depends on the corner you drag.
19. Even better than the real deal
You can select a Producer Kit if you want the deep mixing control offered by a live drum recording when you only have samples of an acoustic drum. You can choose a Producer Kit from the Instrument Library. Go to Instrument Library, click on Drum Kit, and then Producer Kit. With Producer Kits, close-mic channels are generated for every drum, together with room, overhead, and leakage channels.
20. Discussing Percussions
MIDI, Drummer, and audio sections; all play a role in making good drum parts.
Step 1:
We are using Drummer’s Modern House kit here. There is not much control offered over drum pattern details other than the general changes we can make here.

Step 2:
In order to have more control, right-click the Drummer part and click on the ‘Convert To MIDI Region’ option. This will turn the region into a typical sequence, with individual tracks now displayed as MIDI notes. The drum pattern can now be easily edited.

Step 3:
Convert the MIDI sections to audio with Bounce In Place, afterward, choose the last pair of hits, and mute the rest, before you add slow-down effects at the end. Mute the respective MIDI section. A reversed audio file in bar 4’s last beat will be also be created.

Conclusion
No doubt, Apple’s Logic Pro X is one of the best Digital Audio Workstations out there; however, having a Mac is a prerequisite. If you have just started using Logic Pro X, these power tips will surely give you a headstart. Read this article and ride on the shoulders of Logic Pro X experts!